Pocket Fluff, Not Fate: Seven Five-Minute Checks for a ‘Dead’ Charging Port
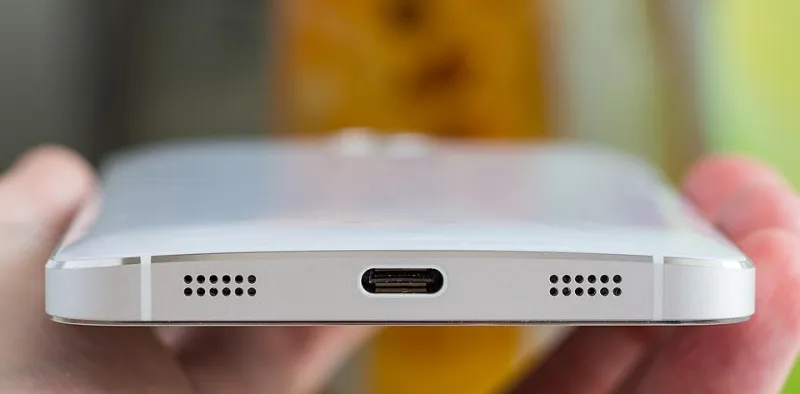
Photo: Ilya Plekhanov, CC BY-SA 4.0, via Wikimedia Commons
Your phone has started doing the thing where it only charges if you hold the cable at a precise 23-degree angle. Your laptop’s USB-C port has become a rumour. The controller that worked yesterday now needs a wiggle and a prayer. Before you add ‘book repair’ to a to-do list that already includes ‘buy mince pies’, do the unglamorous thing: look inside the port.
Most ‘dead’ ports in the UK aren’t dead. They’re blocked, dirty, worn or being asked to work with a cable that’s had a hard life at the bottom of a bag. The fix is often a five-minute kitchen-table job. The trick is knowing when to stop.
First, the two-minute sanity check
Swap the cable. Swap the charger. Try another socket. Check the other end of the cable, too — the plug that goes into the charger gets just as much fluff and bending as the one in your device. If you have a known-good cable and charger, use them. If the device charges wirelessly, try that to confirm the battery itself is fine.
This sounds obvious, but a surprising number of ‘dead ports’ are actually dead cables, dead chargers or a USB-C cable that only handles data and never handled decent charging in the first place. Use the cable and charger that came with the device, or a reputable replacement, not the one from the drawer with a frayed end and a mystery history.
1. Shine a torch into the port
Turn the device off. Use your phone torch or a small torch and look straight into the port. You’re checking for three things: compacted fluff, bent or flattened pins, and corrosion. Pocket lint often looks like a grey or beige felt pad pressed against the back wall of a USB-C port. On a Lightning port, look for dark debris around the pins. On HDMI or USB-A, look for dust bunnies and bent tongues.
If you can see green or white crust, black charring, melted plastic or pins that are clearly bent into each other, stop. That is not a five-minute job. That is a repair.
2. Use a wooden toothpick, not a metal pin
A wooden toothpick or a plastic dental pick is the right tool for loose pocket debris. Gently scrape along the walls of the port, working towards the middle. Don’t dig at the central tongue of a USB-C port, don’t lever anything, and don’t use a paper clip, needle, SIM tool or knife. Metal tools scratch contacts, bridge pins and turn a cheap clean into an expensive board repair.
Do it over a piece of kitchen roll so you can see what comes out. If a small grey wad of fluff lands on the paper, congratulations: you may have just fixed your phone.
3. Brush, don’t scrub
A clean, dry, soft-bristled toothbrush is useful for loosening dust around the port opening and in laptop vents. Use light strokes and keep the device upside down so debris falls out rather than in. Don’t scrub hard, don’t use a wire brush, and don’t attack the contacts. If you’re cleaning a laptop, avoid spinning the fan with a brush or a can of air; that can damage the bearings.
A few short bursts from a can of compressed air can be okay for a laptop vent, but it’s a poor choice for a phone port. The propellant can chill the components and condensation is not your friend.
4. A dab of isopropyl alcohol
For greasy grime, use 99% isopropyl alcohol or surgical spirits from a UK chemist. Turn the device off, unplug it, and put a tiny amount on a microfibre cloth wrapped around a plastic pick or a barely damp cotton bud. Dab — don’t pour. Let it dry fully for at least ten minutes before charging.
Don’t soak the port, don’t push liquid into a laptop, and don’t use household cleaning sprays. Alcohol is for the contacts and surrounding plastic, not for flooding the inside of your device.
5. Check the cable end as carefully as the port
Look into the connector on the cable itself. Lightning cables collect lint in the same way phones do. USB-C cable ends can have bent shells or compacted debris. If the cable end looks damaged, stop using it. A cable that heats up, crackles or only works at an angle is a fire risk, not a bargain.
6. Test the device’s other holes
If your laptop has two USB-C ports, try both. If your controller has a USB-C port, try charging it from a different charger and cable. If one port works and the other doesn’t, you’ve narrowed it down to the port rather than the battery or charger. If none work, go back to the cable and charger. If the device only charges when you press the plug upwards, the port is worn or loose — cleaning won’t fix that.
7. Know when to stop poking
Stop and book a proper repair if you see bent pins, black charring, green corrosion, melted plastic, a port that wobbles, a device that gets hot around the port, or any sign of liquid damage. Stop if the device smells hot or burning. Stop if it’s under warranty or insurance and you’re not sure whether your cleaning counts as ‘interference’. Stop if you’ve spent more than five minutes and you’re reaching for something sharper.
A port clean is cheap. A new charging board is not. A damaged logic board is worse. The best five-minute fix is the one you stop doing at the right moment — and a good local repair shop will thank you for not making things worse.
Set a timer, use a toothpick, and if the fluff doesn’t come out, put the device down. Pocket lint is common. Panic is optional.